Two weeks ago, I was in Missoula, Montana to introduce the Rocky Mountain School of Photography’s 2015 Summer Intensive students to B&H. I’ve been visiting the school since 2006 and it is always a thrill to help usher in the next generation of photographers. SI is an immersive 11-week course over the summer, in which the students learn and improve their photographic skills. We were there for week 1 and showcased the tools that would help prepare them for a successful foundation as a photographer. Of course I kicked things off with a group shot with the Theta 360 camera! None of the students had seen that camera before and as I passed around the interactive image on my phone…the magic of photography created panoramic smiles around the room.

All these years that I have been coming to Missoula, I’ve never made it to Glacier National Park. Known as the Crown Jewel of the Continent, I was determined to make it out there this year. To find the best spots to shoot, I tapped the minds of my good friends, Tim Cooper and David Marx, who have been teaching workshops there for many years. The no-brainer decision was to rent Harley Davidson Street Glides and make it an official road trip! My coworker, Jason Geller and I, followed the yellow lines as we chugged past Flathead Lake. The many twists and turns finally guided us to the entrance of the western side of Glacier.
Even though it is open year-round, the season had really just started for Glacier, and only 15 miles of the Road to the Sun were open. There were hardly any tourists and we had the road to ourselves. Glacier isn’t just about the journey on the Road to the Sun; there are many destinations along the way.
The weather totally cooperated with no rain and minimal clouds in sight. Our cabin was a stone’s throw from Lake MacDonald, and the sun wasn’t setting until 10pm, I knew it was going to be a late night of shooting! We walked along the shore looking for the best vantage points during the day and I returned at 11pm when the first stars began to appear. The moon was waning and wasn’t going to play a huge factor, as it wasn’t due to rise until 1am and actually never made it over the ridge of mountains before dawn. However, with pure darkness not appearing until after midnight and twilight starting just after 4am, I didn’t have a large window to work with. National parks are wonderful to shoot at night, mainly due to such minimal light pollution, and of course dramatic landscapes. Glacier did not disappoint.

I had two systems with me: the Sony A7s mounted with my favorite lens – the Zeiss 21mm 2.8. Right now, the A7s is the undisputed king of Milky Way capture because the attainable higher ISOs (I feel comfortable up to 51,200) can give you more optimal apertures and shutterspeeds. In this case, however, it wasn’t cutting it. The lens just wasn’t wide enough for me to capture the majestic Milky Way, Lake MacDonald, and the Lewis Range of Rocky Mountains. My other kit, that I brought for more daytime shooting, was the Fujifilm XT1 and the 10-24 lens (15-36 equivalent lens). This was exactly the focal length I needed and pretty much shot it vertically and at the widest focal length. The XT1 is no slouch at night; if you can keep it under 6400 ISO I would put it toe to toe with all the other contenders.
I absolutely love the 10-24 f/4 lens for night work. I used to always lean on the Zeiss Touit 12mm 2.8 lens, but I find the 10-24 to be sharper, wide open. Yes you lose a stop at f/4 but the wider focal length allows you to squeeze ½ stop back with a longer shutter speed. I was forced into ISO 6400 with an exposure time of 30 seconds at f/4. Embracing the grain with Milky Way images is typically not a bad thing. I converted it to B&W using DXO FilmPack 5 for the image you see above. The brightest part of the Milky Way, the Galactic Core, is the cluster of stars on the right hand side. I wasn’t able to include any more of it because of tree interference.
So I switched gears and decided to go for a 1 hour+ star trail shot. The temperature was around 60F, so I knew I would need to take multiple shots and “stack” them later in Photoshop. I did a few quick test shots, with my main consideration of lowering the ISO. Celestial shots can work with higher ISO grain, but generally we like our star trails to be richer and cleaner.
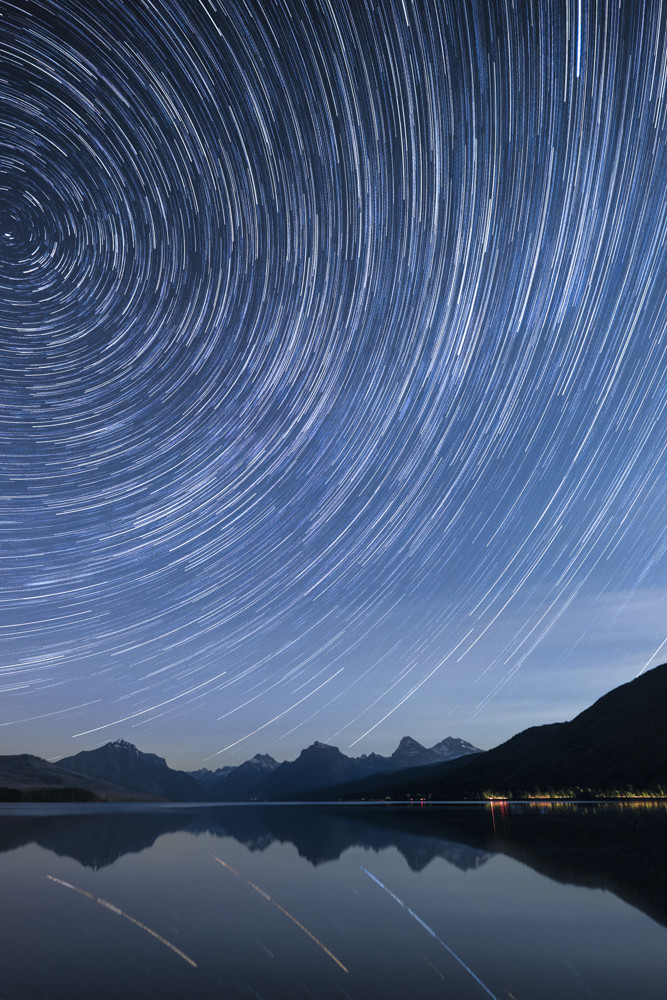
My end decision was ISO 3200, f/4, for 2 minutes. This was a stop more than the equivalent Milky Way shot and brought my histogram more to the middle. Higher ISO’s and wider apertures will also increase the amount of stars your camera can capture. I would have generally gone with a lower ISO and longer shutter speed – like 1600 and 4-5 minutes, but I like the brighter stars and stronger sense of movement achieved from this shorter stack of 2 minute shots. The north star just made it into the upper left hand side and I absolutely love the long trails reflecting in the lake. I was fortunate enough not to experience any planes trailing through my image. But I did appreciate the car lights opening up the Road to the Sun several times throughout my 40 shots. The total time that is “seen” in this image is 1 hour and 20 minutes. I would have gone longer but moonlight was really making a bright impact on the image and I was worried about it washing out too many stars. I am thankful that it lit up the mountain range beautifully, enhancing the detail and their reflection even more.
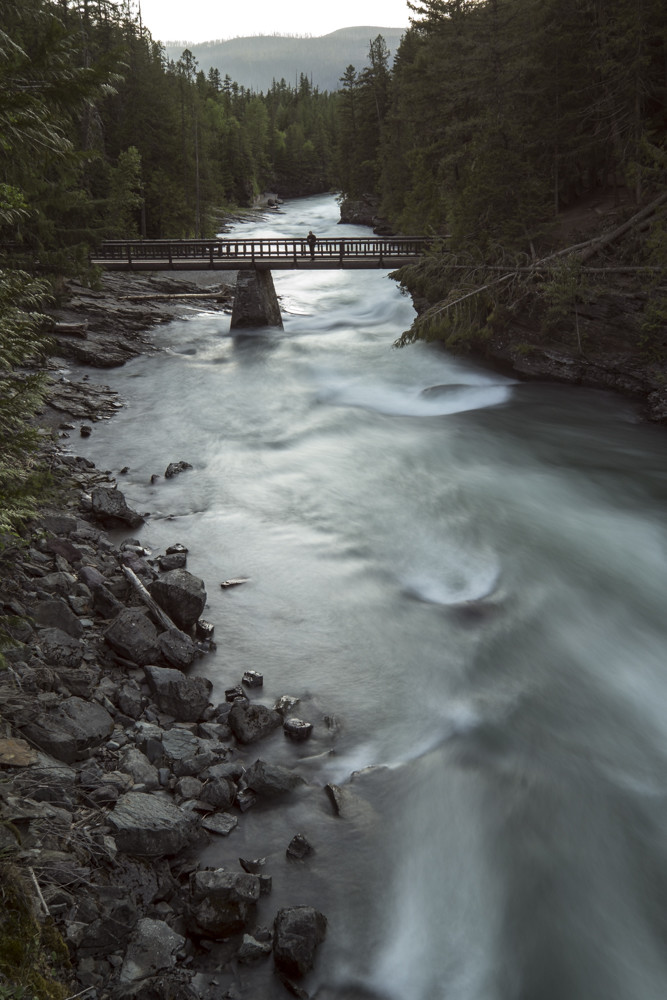
The last shot I’d like to share with you is from MacDonald Creek Falls, which really shouldn’t have the name creek in it at all – because it was moving like the Mississippi! This was one of those rare daytime shots that I take. I used a Hitech/Formatt 6 stop full ND filter, to take this shot from 1/15 of a second to 5 seconds. 1/15 of a second didn’t emphasize the motion of the water enough. The 10 stop ND would have made it around 1 ½ minutes, which would have made the “creek” too smooth. I also love the human element in this image – that’s Jason on the bridge. We didn’t plan this, but when I saw him walk over the bridge I started yelling over the roar of the falls and he did a damn good job of reading my hand signals! I also love that with 5 seconds we still retain the shape of the water as it moves us throughout the photograph.
The next day we looped along the southern end of glacier and wound our way up the eastern side with a beautiful stop at Two Medicine Lake. Around each twist and turn in the road, an awe-inspiring vista awaited, as well as a precarious 6-8k drop! We only had one night to spend at Glacier on this trip…but I’ll be back – The Road to the Night Sky is a constant journey.
Carpe Noctem!

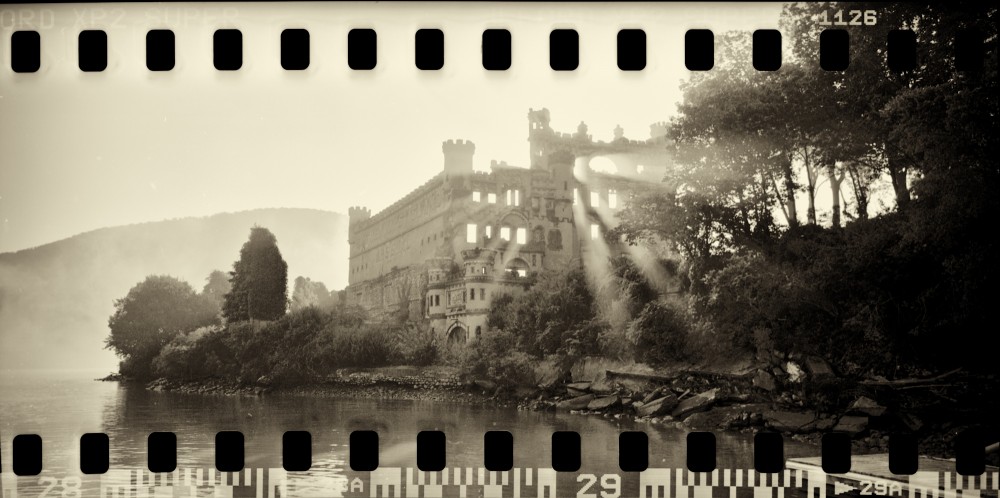
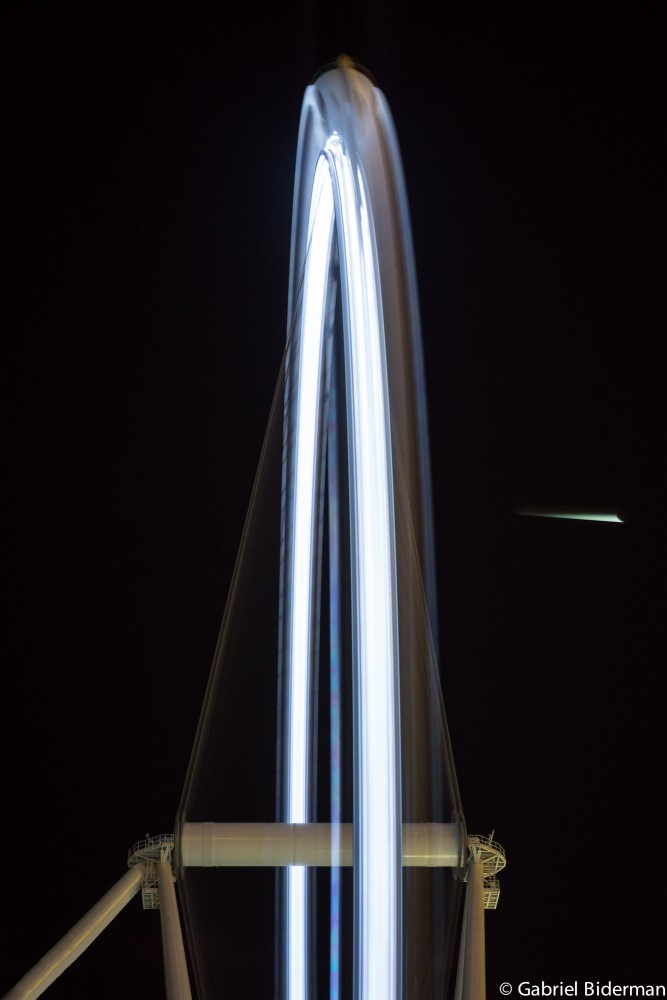
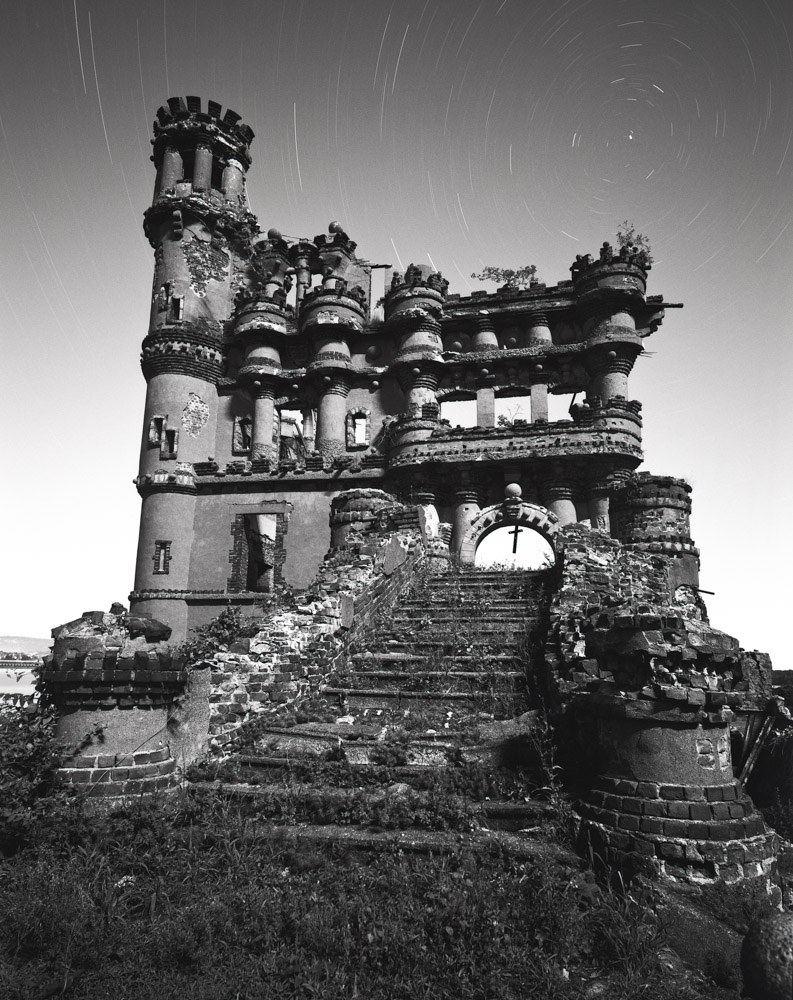 Bannerman Castle 03 ~ Mamiya 7 with 43mm lens ~ 1 1/2 hours at f/11 ~ Fuji Acros 100 film