Niagara at Night

Posted on 2 Comments

Dismal weather dispels photographers, but for those who aren’t afraid of get a little wet, dramatic images can be captured.
Did I say a little wet?
I was pelted with hail when I landed in Buffalo.
Then it rained, rained, and rained.
But the idea of shooting Horseshoe Falls, the Canadian Side of Niagara Falls did not deter me and the unofficial “Mayor” of Buffalo, Wayne Geist.
So around 11pm, after we were done working our gig on Grand Island, we drove 5 miles, crossing the border, and headed over to the Horseshoe.
With the wind blowing the rain and mist from the falls everywhere, we probably set a record for the fewest amount of tourists (4) since the 17th century.
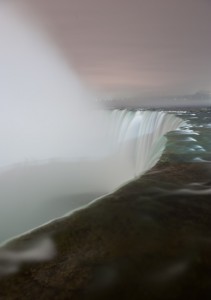
I worked quickly doing several test shots to work out composition and exposure, and when the wind finally decided to not blow the mist right towards us I quickly set up a minute and a half exposure.
We were standing right at the edge of the Horseshoe Falls, the sound of the water crashing over 170 below was deafening.  I love the pinkish sky and that you can see our reflection in the mist.

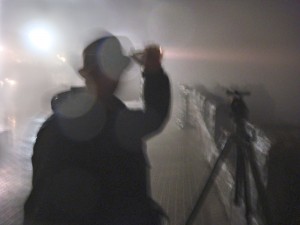
Wayne’s picture below more accurately shows the weather conditions.  I’m using a flashlight, practicing lightening up the rocks in the dark foreground of the falls while protecting my camera under my coat.  I really missed my Kata Rain Cover which would have done a much better job protecting my camera and lens from the Niagara Elements!
All in all we spent 20 wet minutes at Niagara Falls which of course was fun to explain to border police as we returned back into the States!

The Fine Art of the Long Exposure Workshop ~ June 12-13, 2010

Posted on

Hosted by
Charleston Center for Photography

Limited Availability!!!

Date: June 12-13 2010 (Sat & Sun)

Instructor: Gabriel Biderman

Where: Charleston Center for Photography, Charleston, South Carolina

Cost: $500

Join Night Photographer Gabriel Biderman as we reinvent how we capture the “essence of Historic Charleston and the Lowlands.”

In this 2 day/night workshop we will look beyond the fleeting moments of time and explore images that can be created when you expose for seconds, minutes, and even hours with your camera. Gabriel Biderman is a self-taught photographer who has been specializing in the fine art of the long exposure with everything from pinhole to the latest digital cameras.

He will go into detail on how to meter and process your long exposures using either film or digital capture. This hands on workshop will include lecture time, studio shooting, and night photography.
Light painting, star trails, and how to create ghosts during the day and night will also be featured in this weekend workshop.

We will also explore mixing the twilight and city lights of historic Charleston as well as utilizing longer exposures in the lowlands of South Carolina.

Please click here for additional information & to sign up for the workshop.

Twilight Stop ~ Photo of the Week

Posted on 4 Comments

When I was first getting into photography I was told that the easiest way to improve your images was to shoot during the magic hours, usually one hour before sunrise and one hour after sunset. For some crazy reason I chose the early morning hours to shoot. I was immediately impressed by the soft quality of light in which to work with but early mornings are really not my forte. I’m more of a late night guy and soon afterward a body of work began to emerge from this nocturnal shooting.
The magic hour of civil twilight, or the blue hour, has neither full daylight or complete darkness. It is one of my favorite times, whether I have a camera or not. The quality of light is amazing as the cobalt blue sky can quickly change to deeper shades of blue until complete darkeness.
How long this civil twilight lasts all depends on your longitude and what time of year it is. Twilight can last 15-20 minutes near the equator or several hours when you get closer to the poles. When I was in Alaska in the summertime, I remember twilight lasting until 2am.

In Brooklyn the civil twilight has been about 45 minutes lately. Luckily the other day I exited the subway just in time for a true magic hour moment.
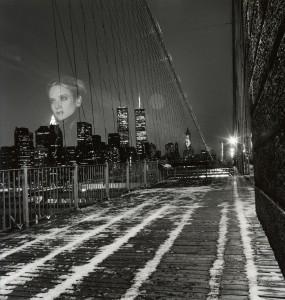
The top image reminds me of something Brassai might have shot during his nocturnal adventures in Paris during the 1930s.
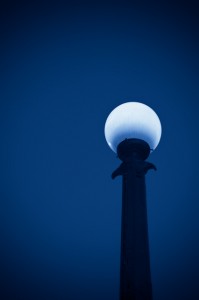
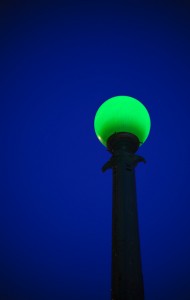
When I imported the images into Lightroom, my preferred program to process digital files, I converted the above image to black and white to create more of a dramatic look.  However I missed the twilight blue sky, so I started toning selenium and mixing the blues back.
I really like the end result. I’ve included another version of “Twilight Stop” that was not converted to black and white.
Which do you prefer?

For more info on the making the most of the magic hour check out Tim Cooper’s new DVD Magic Light – The Landscaper Photographer’s Guide.

World Wide Pinhole Day 2010

Posted on 2 Comments

Well I hope you polished off your pinholes and had some fun this weekend!  The last Sunday of every April marks World Wide Pinhole Day.  People from all over the world take a step back and use a handmade pinhole camera or converted digital camera to create amazing images.
This year’s online gallery is already starting to populate so check out it out!
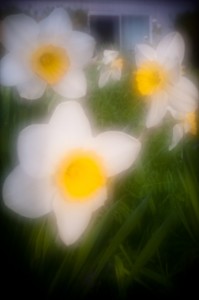
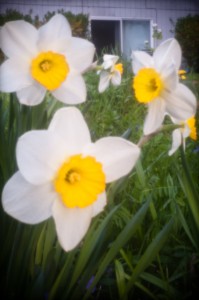
My film shots are still waiting to be dropped off at the lab tomorrow, but I did take my Lensbaby ZonePlate/Pinhole lens for a walk with my D700 camera.  In the two shots of the daffodils I wanted to show the difference between the soft focus glow of the zone plate and the soft sharpness of the pinhole.  The beauty of the Lensbaby dual optic is the ease that you can switch between Zone and Pinhole mode.  This $35 optic will definitely make you see in a new way with your Lensbaby.  The Zone Plate is a permanent f/19 and the Pinhole is f/177, both settings make it dim to look through the viewfinder of your SLR camera.  I find it easier to compose by putting my camera in Live View mode, which shows the “live” image on the back of the screen.  In a sunny environment the Zone Plate is easy to compose this way. Take a test shot, if  you like it ~ why not shoot it again with the pinhole setting?  I advise using a tripod if possible.  The Zone Plate is easy to use handheld on a sunny day but the pinhole will have 2-10 second exposures on a bright day.  Remember the Pinhole setting needs about 5 more stops of light to get the equivalent exposure.
Don’t feel like counting the math of 5 stops?  Here is a little reciprocity math trick:
I call it the Six Stop Rule:
If your Zone Plate Exposure equals 1/10 of a second exposure
Change your Pinhole to a 10 second exposure, which would be 6 stops difference, then half that number (subtract a stop) which would be 5 seconds and the equivalent of 5 stops.

Let’s try it again:
Zoneplate Exposure equals 10 seconds.  To add each stop of light you need to multiply by 2.
20 seconds = 1 stop
40 seconds = 2 stops
80 seconds = 3 stops
160 seconds = 4 stops
320 seconds = 5 stops
320 seconds = 5 1/2 minutes.  The difference between 5 and 5.5 minutes at such a long exposure is negligible.

You can use the “Six Stop Rule” easily to compute the switch from zone plate to pinhole with the Lensbaby optic.
Tens of seconds = Seconds (minus a stop) – 1/8 second = 4 seconds
Seconds = Minutes (minus a stop) – 15 seconds = 7.5 minutes
Minutes = Hours (minus a stop) – 2 minutes = 1 hour

I’ll be teaching more about the Fine Art of the Long Exposure at a FREE seminar at B&H Photo on May 27th from 11am-1pm.  Feel free to bring by any pinhole or night images for feedback, and if you shot any pinhole on World Wide Pinhole Day, upload them to their site!

Hope to see you there.

At the Drive-In… Ode to Sugimoto

Posted on 3 Comments

Galleries and Museums are an invaluable source of inspiration. It was on one of my first visits to the Fraenkel Gallery in San Francisco that I was introduced to Hiroshi Sugimoto’s work. I was awestruck when I saw the small 8×10 image of the old movie theater at Radio City Music Hall hanging on their wall in their back room. The movie screen was burning bright white and subtly lit up the entire theater. As I studied it more I saw ghosts of a few people sitting in seats. I was enthralled.

Sugimoto explains: “I’m a habitual self-interlocutor. Around the time I started photographing at the Natural History Museum, one evening I had a near-hallucinatory vision. The question-and-answer session that led up to this vision went something like this: Suppose you shoot a
whole movie in a single frame? And the answer: You get a shining screen. Immediately I sprang into action, experimenting toward realizing this vision. Dressed up as a tourist, I walked into a cheap cinema in the East Village with a large-format camera. As soon as the movie started, I fixed the shutter at a wide-open aperture, and two hours later when the movie finished, I clicked the shutter closed. That evening, I developed the film, and the vision exploded behind my eyes.”

At the time Radio City Music Hall was the only image of his hanging at the Fraenkel. But his series on Theaters lasted from 1975-2001 and took a nice turn when he incorporated Drive-Ins.

Let’s just step back and think about this for a moment. Large format camera, probably an 8×10, that he exposes for the entirety of the movie; capturing all the millions of film images on his single frame. The essence of the movie is white light which is time itself exposed.

With Drive-Ins and classic movie houses all but extinct in America, these images truly capture the spirit of a fading era. It is as if the white screen is revealing all the movies and memories the theater has experienced. The Drive-In shots added extra depth to time-exposed as airplanes and star trails would permanently incorporate themselves to the image.

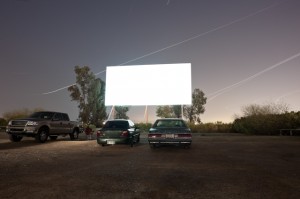
When I found myself in Scottsdale, Arizona with a free night, I remembered the last time I was here I went to the Drive-In. A quick check on the web revealed the Scottsdale 6 was still in existence! It featured not one, but 6 different screens to choose from and is open year round. I packed two tripods and cameras, one film and one digital, to see what I could capture. It was jam packed at the Scottsdale 6 on a Saturday night, at least 50 cars at each screen. We eased our way to the middle of the Shutter Island screen, second row. I set up both tripods low and directly in front of the car so as not to interfere with anyone else’s vision. A truck load of teenagers next to us must have thought I was recording a boot leg version! I set up my Mamiya 7 to expose for the entirety of the film but came to the conclusion that digital capture would really max out with a 30 minute exposure. Add 30 minutes of in-camera noise reduction which gave me two shots to make some magic happen.

You can see the airplanes come and go, or circle around on the right; star trails shoot straight up on the left. Why is there one person, yet three cars? Cars were turning on and off to recharge their batteries throughout the film and their headlights briefly lit up the foreground giving more depth to the image.

It was very exciting to capture this amount of time in one exposure. Often with long exposures and night photography, the camera will reveal much more than our eyes can see.
It is this unexpected certainty of knowing some of what will happen during the exposure- but how much of it can we control?

Let go, and let the visions explode behind your eyes.