Session 9, Eddie Adams Workshop, & the Lensbaby Plastic Optic

Posted on 4 Comments

Happy Halloween Everyone! I hope you all spend some time living out a fantasy, eating candy, or at least watching a scary movie tonight!Nancy and I just watched Session 9, which is thrill/horror movie that just gets under your skin. It tells the story of the haunting of the Danvers State Hospital, which was built in 1878. At the time it was a beautiful 70,000 square foot Gothic spired building that from high above looked like a giant bat. It was the model for humane treatment at the turn of the century but we know how that worked out in the lobotomy happy 50’s. The fortress-like castle was closed in 1992 and Brad Anderson filmed Session 9 there in 2001. The movie, to some extent, foretold the future of Danvers State Insane Asylum as it was renovated in 2006 by Avalon Communities. Only 1/3 o the hospital remains but for as little as $1175 a month you can rent 775 sq ft in a former “Haunted Insane Asylum.” Of course, a fire broke out in April of 2007 and destroyed 3 unfinished buildings that were to house 147 apartments. The cause of the blaze was “officially undetermined”Check out urban explorer extraordinaire, Mr Motts, who has some amazing photographs of the pre-renovation Danvers State Hospital. His website Opacity is probably one of the best for historic ruins. I don’t know how he gets into all these places but when he does he truly captures the essence of the space. His site not only showcases some amazing photography but also features the rich history of these abandoned buildings.

BarnstormXXISM.jpg


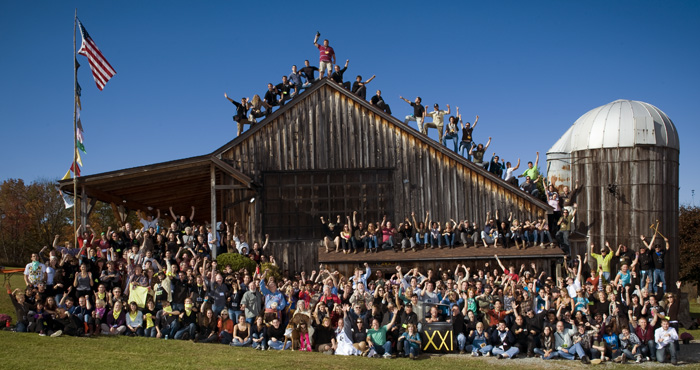
In other news, I’m still recovering from the Eddie Adams Workshop up in the Catskills of New York, where I volunteered during the Columbus Day Weekend. This was the 21st annual EAW and the 4th that I have attended. It is the premier workshop for young photojournalists; thousands apply via portfolio but only 100 are chosen. Those 100 students are divided into 10 teams of 10 and then assigned a famous professional photographer, editor, and producer to their team. The workshop takes place at Eddie and Alyssa’s Barn in Jeffersonville, New York. The students are given 2 days to complete their assigned shoots, while the rest of the team work around the clock to edit and put together multimedia slide shows for the final presentation on Monday. The 100+ Industry heavies that come up and volunteer their time and share their stories make this an amazing community event in an industry that is not always the most communal. I usually average about 8 hours of sleep, total, for the whole weekend. But of course there is always a little mandatory after hours relaxation going on! I’m part of the Black Team, who runs all the behind the scenes activities like AV, IT, Security, Transportation, Hospitality etc. A really humorous movie about “Black Team Love” and what really happens behind the scenes was made by my man Andre Costantini and can be viewed here.

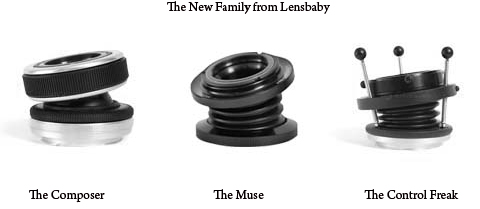
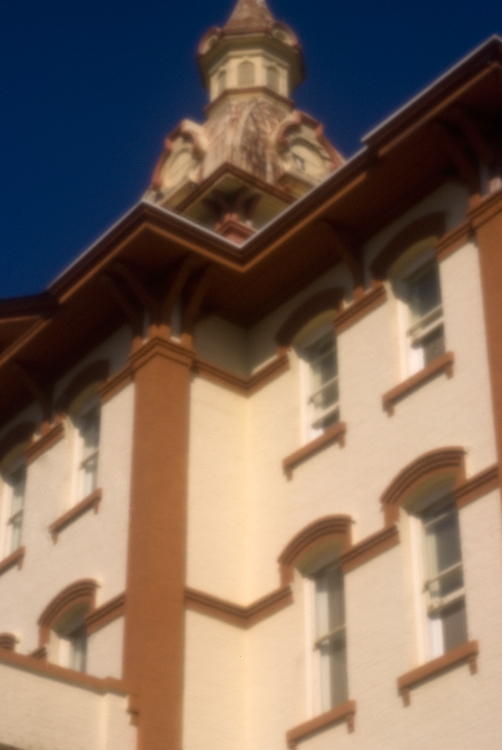
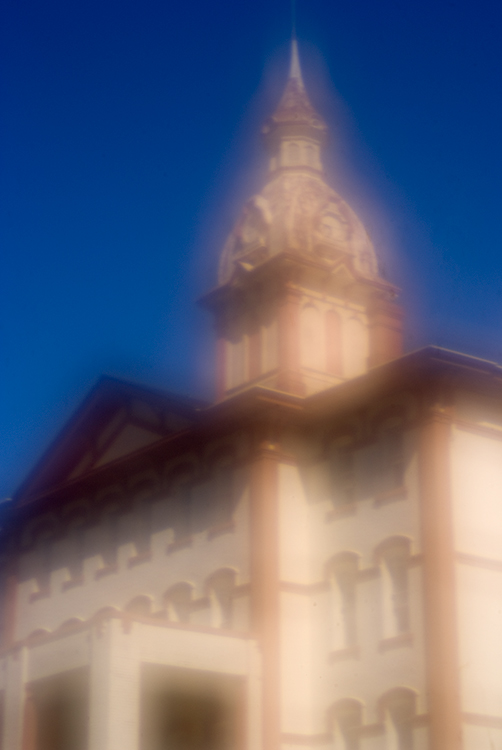
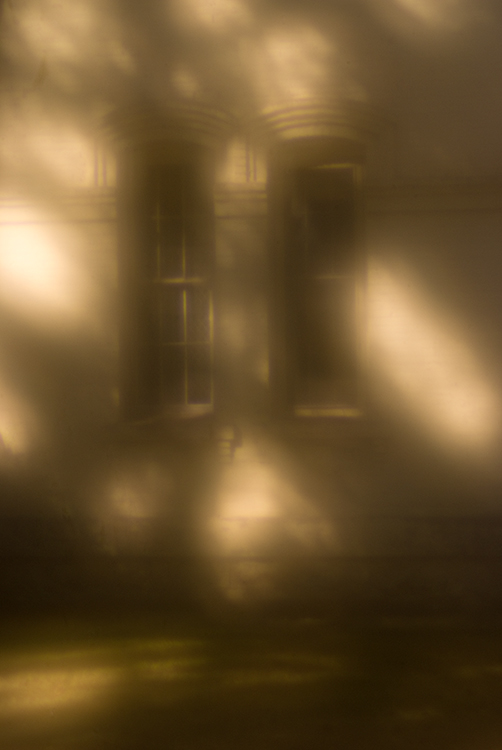
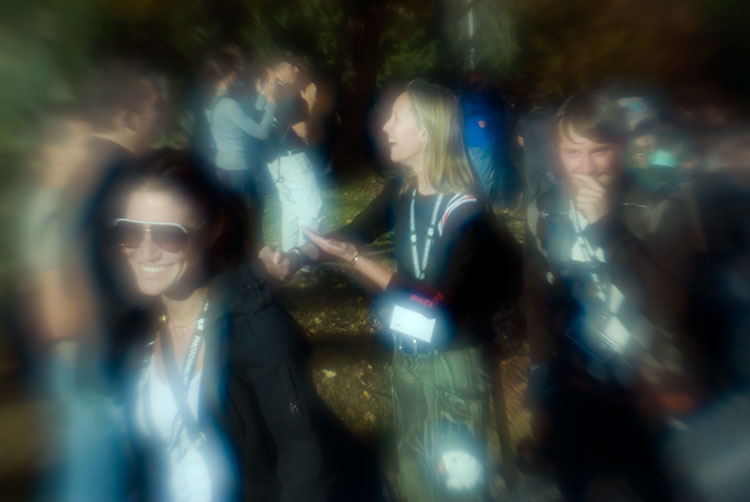
I’m also continuing my beta testing for Lensbaby who sent me an updated Composer with the Plastic and Pinhole/Zone Plate Optic kits. As mentioned in my previous blog, the new Lensbaby Composer is actually a unique housing for several types of Optical Elements that Lensbaby calls their Optical Swap System. Essentially you can own one Lensbaby but have up to 4 different optical effects! I was very excited to try the Plastic Optic as it is a single plastic lens that is suppose to have the image quality similar to the very popular Holga toy cameras. I really have to say that it actually looks better! The two shots above were taken with the Composer Plastic Optic and the first one has an extraordinary glow from the shiny students arriving at the barn! The second image in the more subdued light combines the best of the Lensbaby selective focus and Holga plastic perfect imperfection. It is a picture of Philip Andrews, who coincidentally won the top prize at the workshop…a 10k scholarship from Nikon to continue his studies. Congrats Phillip!


20081019_GAB_1.jpg

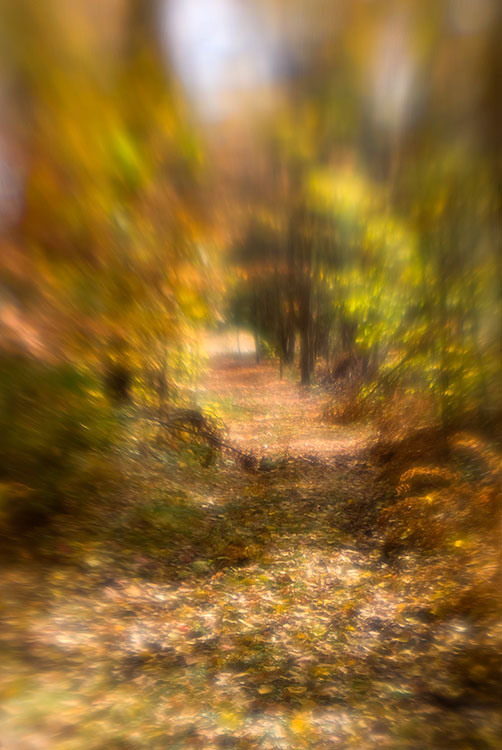
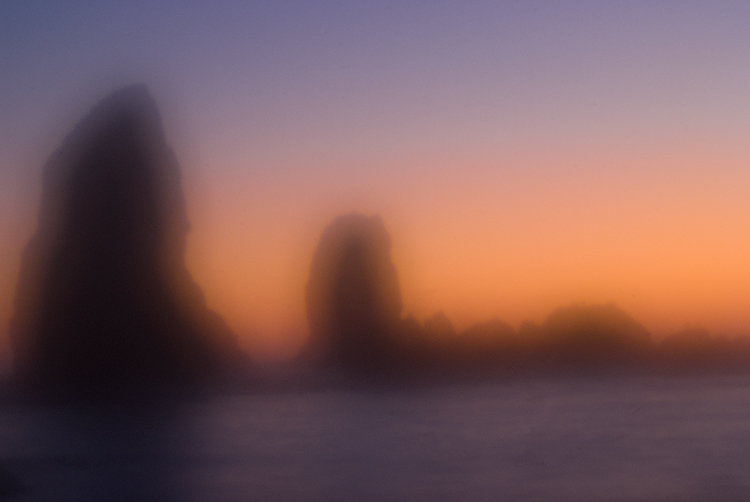
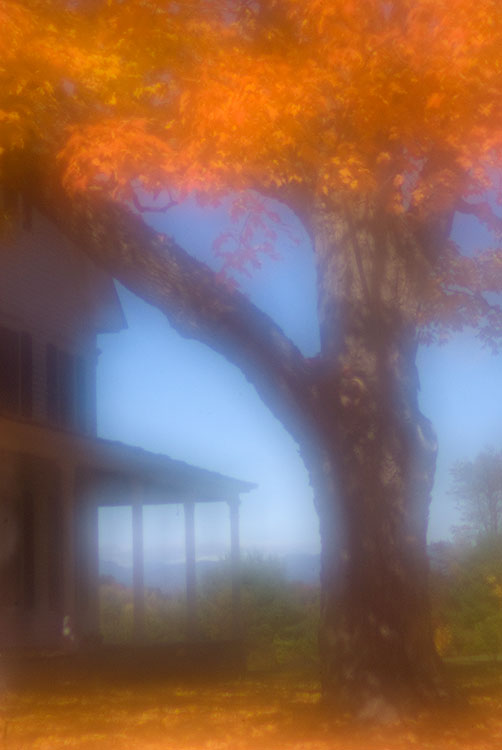
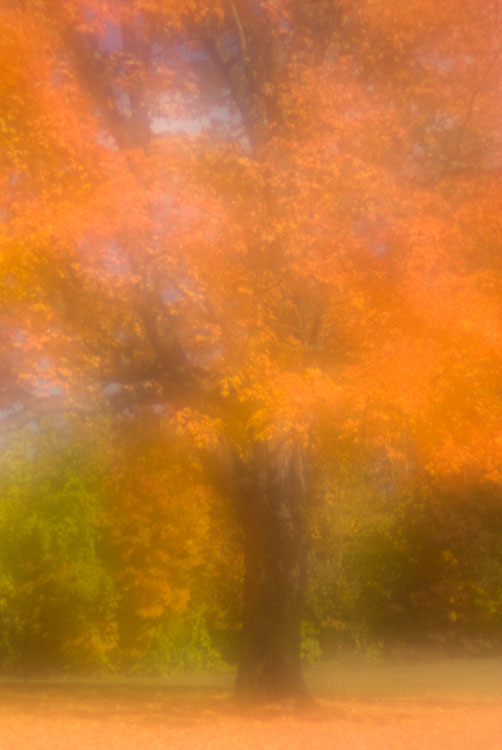
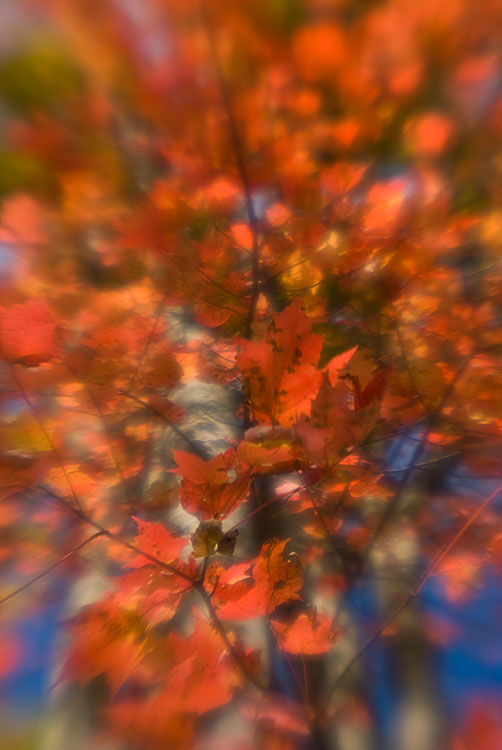
The next weekend after the EAW I continued my travels with the Lensbaby Composer to the Kancamagus Highway in New Hampshire. It was peak foliage time, and I had a blast just driving around with my family and stopping for Composer Inspiration! Yes, big thanks to my Mom, Sister, and stepfather who patiently waited for me as I shot and stopped every 5 minutes! The first two shots were taken with the Zone Plate Optic and have that great zone plate glow. The next two shots were taken with the Plastic Optic and interpret the foliage in more Lensbabified way. I had a blast shooting with them both. If you shoot with any Plastic Toy cameras like the Holga, Diana, etc then getting the Plastic Optic for your new Lensbaby is a must! I also noticed that dirt and dust do show up in your image more frequently when using the Zone/Pinhole Optic. This is not a fault of the lens but a reality of using a lens with a small aperture. Remember the Zone plate is f/19 and the Pinhole f/177. If your Digital SLR has a dusty sensor and you shoot with an aperature of f/2.8 and then f/22 the dust WILL be more prevalent in the image you shot at f/22. That’s just the facts. So be careful when swapping your lensbaby optics and lenses on your DSLR and always have a little rocket blower in your bag.

Lensbaby Composer

Posted on 6 Comments

Good times are ahead in the world of photography as Lensbaby just revamped their entire line of creative lenses for SLR cameras.  I’ve been a big fan of these quirky looking 50mm lenses that create a sweet spot of focus and selectively defocus the other areas.  They’ve been described as bringing a very dreamy and ethereal quality to your photos and because of their unique look they are always an ice breaker when shooting.

So when my friends at Lensbaby asked me to beta test their latest incarnation, The Composer, I was very excited and had no idea what to expect!  I received it right before my trip to the Oregon Coast.  Not only did Lensbaby create the new lens, The Composer, but they also revamped their entire line by adding the Optical Swap System to all their revised lenses.  Now one Lensbaby can have 4 different effects!  You can easily swap out the standard 2 element glass lens for a more dreamy 1 glass element, or 1 plastic element (more holga-esque), or a zone plate/pinhole element!  Ingenious idea!  The Composer that Lensbaby sent me only had the pinhole/zoneplate optical element, so that is what I’ll be focusing on in this article.  Also please be warned that I used a pre-production beta lens and things might still change by the time you buy yours!

The Composer, is and will be the easiest Lensbaby ever to use.  I have owned all the previous versions, and have demonstrated them to thousands of people at photo events.  It takes most people a week of constant Lensbaby use to get the hang of it.  When you first try a lensbaby it  can seem a bit like juggling while taking pictures, and no one really wants to juggle cameras!  However, the new Composer will eliminate all the intimidation of how to focus as it uses a simple ball and socket configuration to smoothly and selectively focus.  The previous versions, now called the Muse and the Control Freak really need the use of both of your hands to focus, while the Composer can be easily adjusted/focused with one hand by simply tilting the lens to the desired focus/defocus. I found the option to tighten the ball/socket to lock the angle position very helpful.  It’s just like the friction control on a ballhead, you can simply adjust the tension for your tilt.  A barrel focusing ring located at the front of the lens aids in fine-tuning the focus.

The zone plate/pinhole optical apertures are f/19 for the zone plate and f/177 for the pinhole.  For those of you unfamiliar with zoneplates, they look like a black and white bullseye targets.  A zone plate consists of a series of clear and dark concentric rings that have very specific diameters to create the chosen focal length.  These specific targets are shot on a clear based film and then placed over the hole that now becomes the lens.  In the Composer the zone plate/pinhole were placed in a shiftable turret making it quite easy to choose which one you wanted to shoot with by sliding the turret back and forth.  To be completely honest with you, I had The Composer for 4 days and mainly used the zone plate setting, which I found the most interesting and easiest to use.  Remember you are shooting with either f/19 or f/177 so your other choices are raising the ISO or lowering your shutter speeds in order to get the correct exposure.  Sunny days and tripods are a must for using the zone plate/pinhole element though I did find the zone plate shooting to be very hand holdable .  Also, the zone plate was easier to view the focusing in the viewfinder of the camera as it was letting in more light.  I usually set the Composer on infinity focus while shooting pinhole.  I was using a hand held meter for judging exposures though the in-camera meter in the Fuji S5 did pretty accurate job.

The first two images are of the Oregon State Hospital, where the movie One Flew Over the Cuckoo’s Nest was filmed.  Angus and I were given a hot tip that OSH was giving a one day only tour of the J ward, where most of the movie was filmed.  The Oregon State Hospital was built in 1883 and is in dire need of asbestos removal as well as other serious renovations.  The complete and total renovation of the J ward and OSH is to begin later this year and hopefully be complete in 2011.  The top image was taken with the pinhole setting on a tripod and the second image was hand held with the zone plate setting.  Notice the beautiful glow that emanates from most zone plate images.  The Diffraction of the highlights creates a very dreamlike look while still maintaining enough focus to make out details.  The pinhole looks sharp/soft and emulates a plastic lens look without the vignetting.  I personally do not like pinholes on SLR cameras.  I like hand made pinhole cameras or pinhole box cameras as there is usually a more imperfect look to them.  Heavy vignetting and bending verticals are usually what I like to see in imperfect pinholes.  Lensbaby creates a pretty perfect pinhole and I advise utilizing the long exposures that f/177 will give you as well as putting something strong in the foreground to heighten the pinhole effect. I found that the tilting or bending of the lensbaby with the pinhole/zoneplate element did not create any selective focus effects in the viewfinder, so I shot most of my images with it focused straight ahead.  I would like to further test this aspect as it would lead to a truly unique effect.

Besides the Fuji S5 with the Composer, the only other camera I had on this trip was the Wisner 4×5 camera.  So when we were led inside the Oregon State Hospital for the tour, I knew I’d be at a handicap shooting indoors at minimum f/19.  Just like any zone plate or pinhole, a tripod is necessary if you want to shoot indoors.  Outdoors, during the day, the Zoneplate Composer will make you incredibly happy as ordinary objects attain a certain glow.  The sunset Angus and I witnessed at Cannon Beach made my Top 5 Most Amazing Sunsets Ever list and I feel the essence of the memory was accurately captured by the zone plate Composer.

I reluctantly gave the Composer back to Lensbaby as they were preparing to bring it to the biggest photo trade show of the year, Photokina. I can’t wait to use it again as well as try the complete optical swap system. All the new Lensbabies, including the Composer, are due out in about 4 weeks. You can preorder and find out more information at Lensbaby.com or B&H Photo.

Matt Hill and the 69th St Transfer Bridge at Night

Posted on 3 Comments
photo by: matt hill
photo by: gabriel biderman

You know when you meet someone and right away it seems like you have been friends for years??
Are you sure we haven’t met before? You’re waiting for the deja vu to happen as you’ve chosen the same paths but were maybe a few steps to the left or to the right.
I knew I liked Matt Hill the first time we met a year ago, but when we finally sat down for some damn good bbq at Dinosaur before a night shoot, it all fell into place. In between bites of scrumpdiddlyumptious brisket and chicken that we washed down with dark beer, we bonded. Matt and I are both Photo Industry dudes who share a strong passion for being creative, especially at night. Matt had already blown both Nancy and I away with his Cut Paper Art, which starts out as a blank piece of white paper that he slices into amazing voyages of creativity. It is truly a complete process of discovery for him and yet very accessible for us. You can check him out “in action” here. His website showcases his weekly cut paper art journeys as well as his “On Creativity” podcasts in which he interviews other artists regarding their creative process. For some of us, it comes naturally, others struggle for inspiration. However, listening to Matt’s podcasts On Creativity have made me think and focus more on my photography; the patterns, the inspirations, and the desire that fuels me.
So after feeding our stomachs with bbq and souls with good conversation, we took our tripods and cameras out for a nightshoot. We started out at Ulysses S. Grant’s tomb at Riverside Park on the Upper West Side and then worked our way down to the familiar 69th St Transfer Bridge. Everything was fairly accessible on this May full moon and we had to stop ourselves from shooting by 1am. Matt got some pretty amazing B&W images using his Mamiya 7 camera with the beautiful 43mm lens. I really like the B&W image featured here, the movement of the clouds on top and the calm reflections of the water on the bottom of the image bring a moving calmness to the image.
I was using a Baby Graflex 2×3 camera for the first time at night and had film backs loaded up with color and black and white. My Baby G camera is a miniature version, using medium format film, of the famous Graflex Press cameras that Weegee and all the newsies used back in the 30’s-60’s.
These beautifully utilitarian cameras use 4×5 film and have very basic swing and tilt movements. The baby Graflex uses 6×7 and 6×9 medium format backs and mine is custom fit with an amazingly fast and sharp Rodenstock 90mm 2.8 lens. I hadn’t used it for a while and I was worried about focusing the camera in the dark of the night. In order to selectively focus with this camera you look through the graflok back, which is a 6×9 piece of glass surrounded by a pop up hood. I brought a loupe along to aid in viewing but I didn’t really need it. All I needed to do was use a bright flashlight to light up the area I wanted to focus on and then switch out the glass back for a b&w or color film back and voila! Image created! I was also using my ricoh grd which produced my winning picture of the night featured here, and a Voigtlander Bessa R with a 60 year old leica lens. Matt and I were also testing out our latest gear acquisitions, our Induro carbon fiber c214 tripods with the dm01 ballheads. Though not as silky smooth as a Gitzo, I do highly recommend the Induro line, which offers great value for the price. I especially like the DM01 ballhead, which is rated to hold 17lbs and is very simple and smooth to use.
To see more of Matt’s photos from the nightshoot click here
And more of mine can be seen here
See you in the night!

1st Coast Birding Festival

Posted on 2 Comments
stork
parrott
gators
bird of paradise

Most of you know that I work for the Marketing Department at B&H Photo and travel all over the country representing B&H at the various tradeshows and seminars. I try to take advantage of my free time by taking pictures and testing out the latest gear, but nothing prepared me for what I was going to experience at St. Augustine.

The show was at Florida’s First Coast Birding & Nature Festival and my objective was to promote B&H and hopefully sell a few binoculars and spotting scopes. I knew the basics of binoculars but had never really used a spotting scope before. A whole new world opened up to me, a world of viewing subjects hundreds of yards away! Instead of using the large lenses that you see on the sidelines of a sports game – a 500mm lens that costs at least $5000 – you can use a spotting scope that will get 2-10x closer! You also cut your cost at least in 1/2, but most importantly you cut the weight. A 500mm lens usually weighs about 8lbs and a large 85mm spotting scope usually weighs less than 4lbs.

There were plenty of bird watching opportunities as the festival took place outdoors at the St. Augustine Amphitheater which was right on the border of the Anastasia State Park. While setting up our table, a hawk flew about 20 feet above me with a flying fish in his claws. Cool! Of course I didn’t bring a 5oomm lens with me. In fact, the longest focal length I had was a Tamron 90mm Macro lens!

That did not deter me from going to the Alligator Farm & Zoological Park to check out their amazing rookery where hundreds of birds were yards away. I spoke with an avid nature photographer from Australia and he said this was the best rookery he had every been too. About 85 alligators lay below the colony of birds and actually protect the birds from other natural predators that would invade the nest. I had never seen so many alligators before in my life, from fast moving baby gators, white ones, and MAXIMO, a 15′ gator that is as old as me but weighs in at 1250lbs!

I do not think of myself as a nature photographer, however, I do consider myself an environmental photographer – shooting what’s around me – and for those 4 days in St Augustine I definitely saw birds everywhere…

Blast from the recent past

Posted on 1 Comment

SXSW 2006Saturday I fly out to Austin for the infamous South by Southwest Music and Film Festival (SXSW). I attended this festival last year with Amy and Angelia from B&H.

Boy, did we have fun!

Awesome live music, Nuclear Tacos, Salt Lick, movie theaters that serve beer and food… basically everywhere you turned, there was something trendy and fun to do.
So I pulled out the SXSW ’06 photos to relive, recharge, and get ready! The images were taken with a recently acquired, high end, point and shoot, ‘no zoom’ camera called the Ricoh GRD.

The folder I found them under was titled Food and Fun in Austin. I kept coming back to this photo. This was the fourth, and last, shot of these roof-top hipsters I took. It was easy to shoot incognito with the little Ricoh. I can’t wait to hit the scene again.

Stay tuned and get ready for the best BBQ review to date: the Salt Lick.